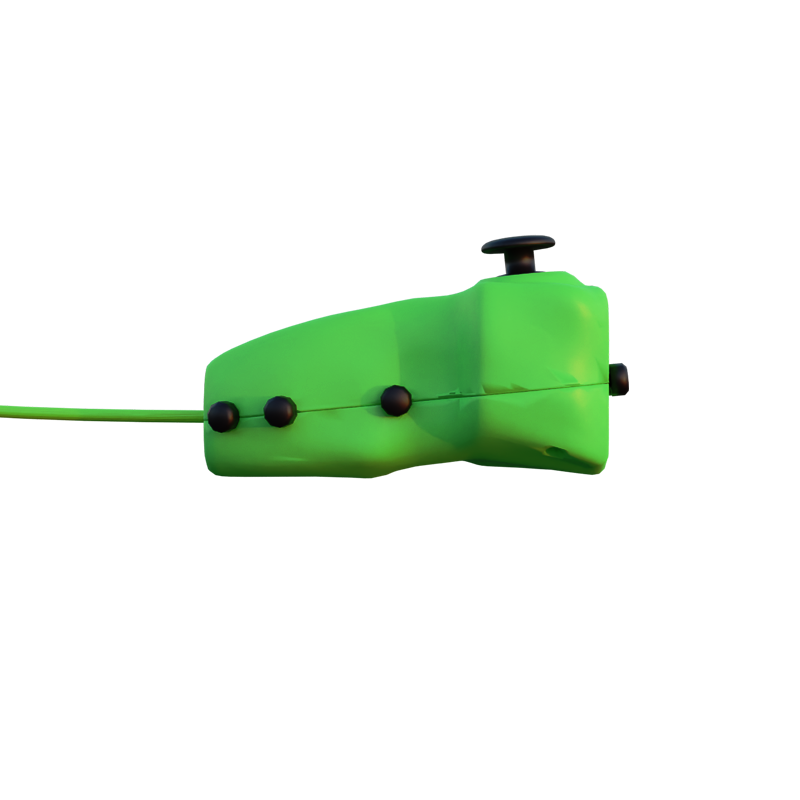
How To Remap The Buttons On Ergo King One Handed Pc Controller With The New Bladegamer Software

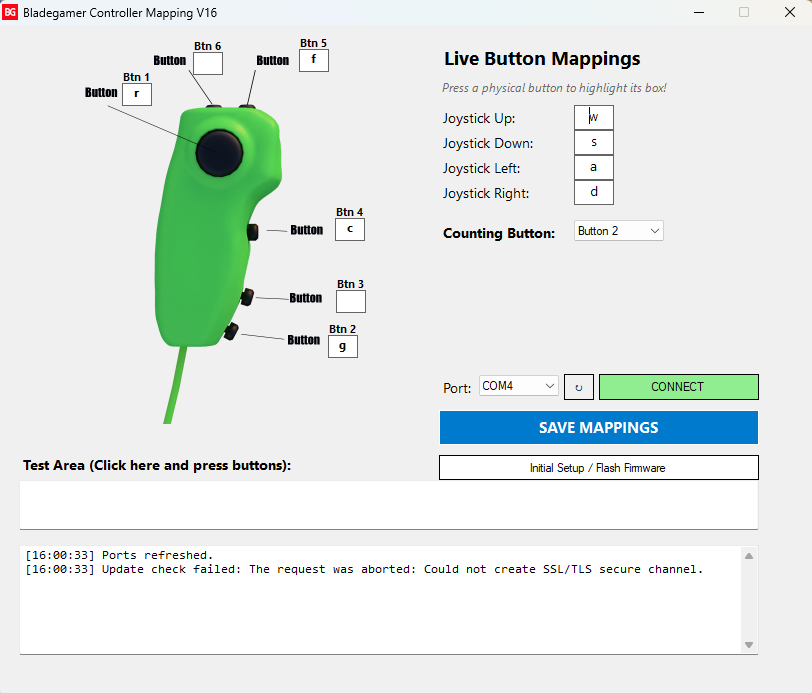
Bladegamer mapping
What is Bladegamer mapping?
BladeGamer Mapping is intuitive software that gives you full control over your BladeGamer Ergo King One-Handed Controller through powerful button remapping tools. Easily customize and reassign buttons to create a control layout that perfectly matches your favorite games, accessibility needs, and personal playstyle. With BladeGamer Mapping, you can tailor your controller settings for greater comfort, improved performance, and a more personalized gaming experience.
Where to get Bladegamer mapping
You can download the software by clicking here
How to use Bladegamer mapping
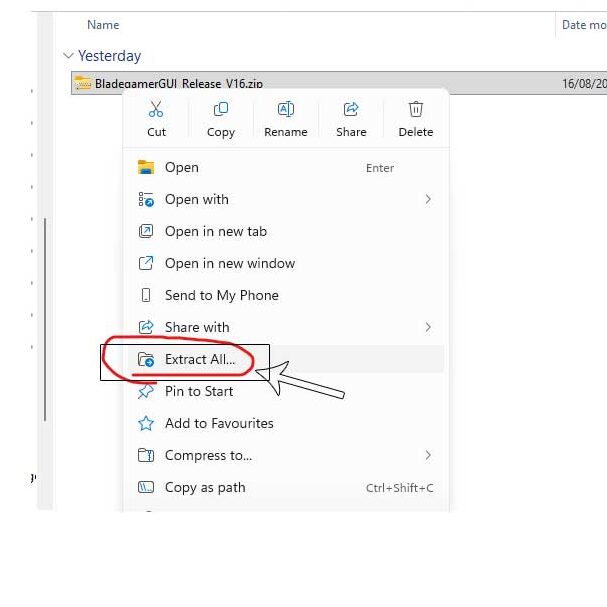
Step 1: Go to your download folder. Extract the software into 1 folder
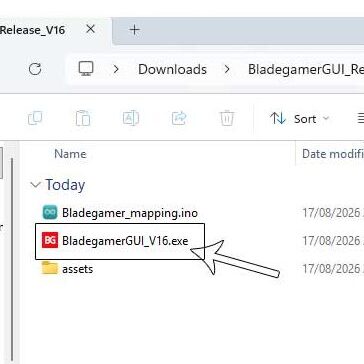
Step 2: Double-click the executable in the extracted folder
step3: During installation, Windows may display a security warning because BladeGamer Mapping is not digitally signed by a major software publisher. This is common for independent software developers and does not necessarily indicate a security risk.
If you downloaded BladeGamer Mapping directly from the official BladeGamer website, you can proceed with confidence. Click More info, then Run anyway to continue the installation.
Thousands of gamers trust BladeGamer Mapping to customize their BladeGamer Ergo King controller, and every release is thoroughly tested to provide a safe and reliable experience.
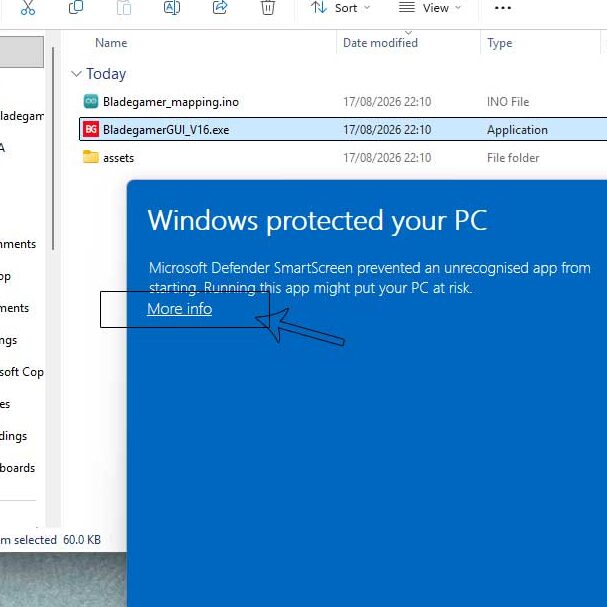
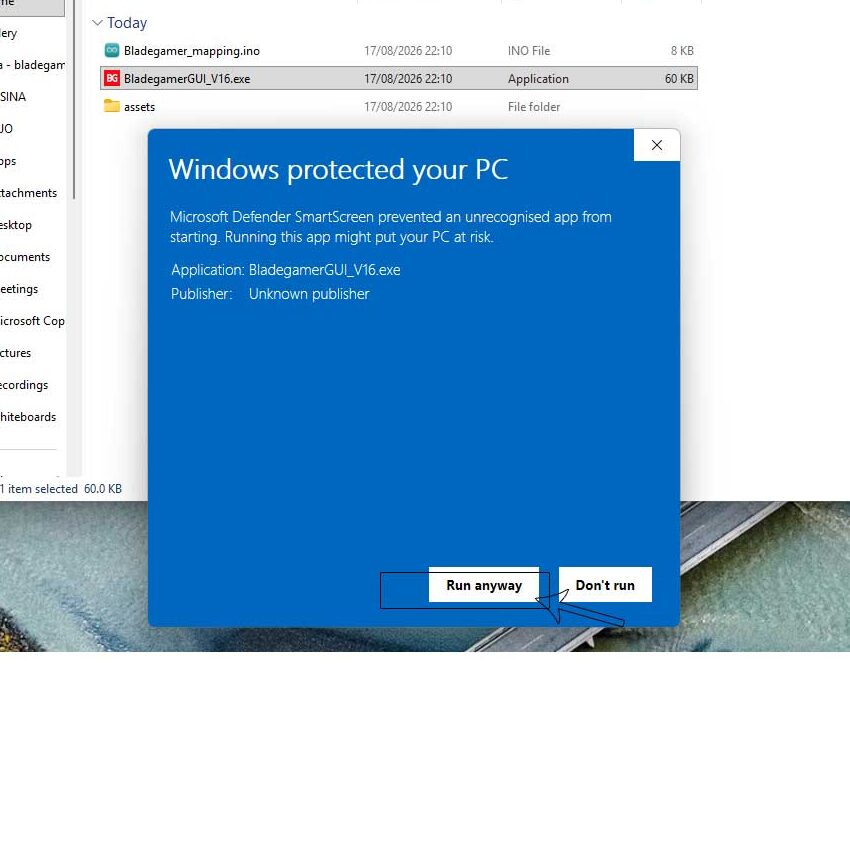
Step 4: Please ensure your BladeGamer Ergo King Controller is unplugged before continuing.
When you open the software, you’ll see a Port drop-down menu. Click the drop-down and take note of the port numbers currently displayed. In this example, Port 3 and Port 4 are shown.
Because the controller is not connected yet, these ports belong to other devices on your computer. Do not select or make changes to any of these existing ports, as they are not associated with your Ergo King controller.
The next step will be to connect your controller and identify the new port that appears. This ensures you select the correct device and avoid changing the settings of other hardware connected to your PC.
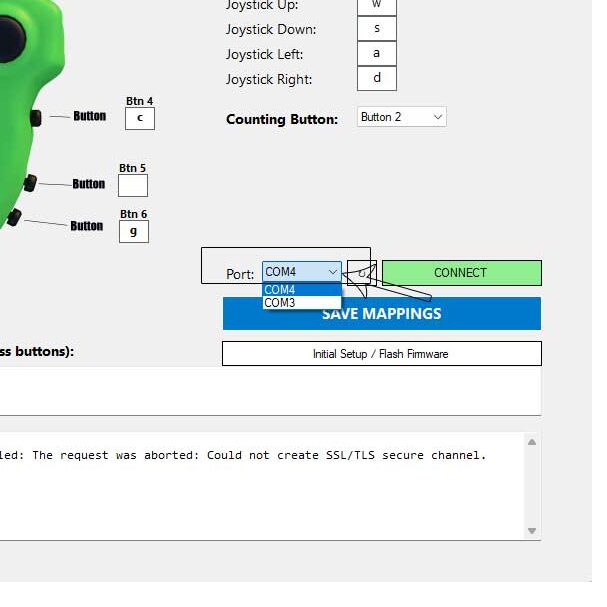
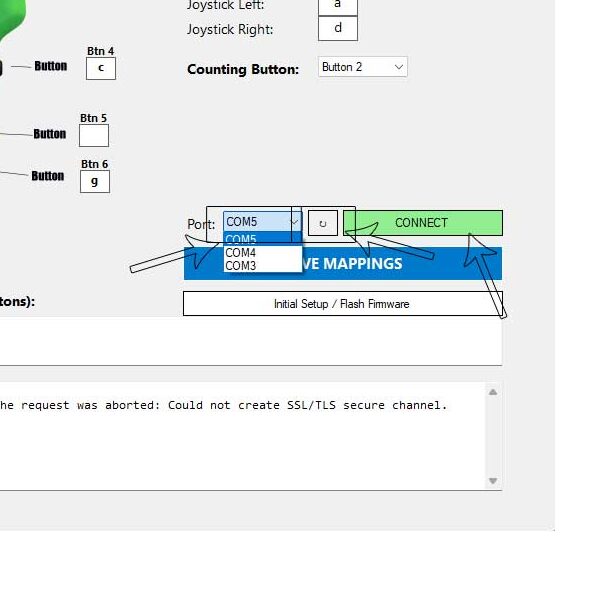
Step 5: Plug in your BladeGamer Ergo King Controller and click the Refresh button in the software. You should now see a new COM port appear in the Port drop-down list that was not visible before.
Select this newly detected port, as it corresponds to your Ergo King controller. It is very important that you choose the correct port before continuing. Double-check that the port only appeared after plugging in the controller to ensure you have identified the correct device.
Please take extra care during this step. Selecting the wrong port could result in communicating with another device connected to your computer. If you are unsure, unplug the controller, click Refresh, and note which port disappears. Then reconnect the controller and confirm that the same port reappears.
Once you are certain you have selected the correct port, click Connect to establish a connection with your controller.
Copilot said:
Step 6: Configure Your Button Mapping
Once connected to your controller, you will see a series of text boxes within the software. These boxes represent the buttons on your BladeGamer Ergo King Controller.
To identify which text box corresponds to each physical button, simply press the buttons on your controller. The software will display the output for the button that has been pressed, allowing you to determine which button is which.
After identifying the buttons, you can:
- Drag and reposition the button fields to match your preferred layout.
- Assign new values and functions to each button.
- Customize the controller to suit your own gaming style and requirements.
Tip: You may need to click and drag the fields slightly with your mouse to clearly see the numbers associated with each button.
Important
When assigning a new value to a button, avoid pressing that button again until you have finished configuring all of your mappings and are happy with your setup.
Counting Function
One of the available functions is a Count 1-10 feature. You can assign this function to a button using the drop-down menu provided in the software. Simply select the desired button and choose the counting function from the available options.
Save Your Mapping
Once you have finished configuring your buttons and are connected to the controller, click Save Mapping.
Your custom layout will be written directly to the controller’s memory and will remain saved even after unplugging the controller or restarting your computer. Every time you reconnect your Ergo King Controller, it will automatically use your saved configuration until you decide to change it in the future. I will also include a video tutorial for this process.